As many event planners know, it’s all about the details! One essential part of a successful event experience is the name badge. It isn’t just about identification, either. When done right, these little guys balance fashion and function to enhance the attendee experience. While most understand the basic elements of a name badge—name, job, QR code—we know some tricks to enhance its potential. These include savvy layouts that capitalize on limited space, proper fonts, event sponsor branding, and the unexpected potential of the back of your name badge.
Knowing how to organize these elements will allow you to create winning event badges that double as meaningful souvenirs. You don’t need to be Picasso to create a winning badge design. Just follow our ultimate guide to event badge design, and you’ll be a pro in no time!
Benefits of an event badge.
You might be thinking, “What’s the big deal?” It’s just a name badge, right? While you can keep to the basic function of an average name badge, you’ll leave a lot of potential on the table. Understanding how a name badge impacts your event will help you design value-driven badges that work seamlessly with event technology to create a heightened experience. The heart and soul of an event badge is its networking potential. It assists guests who want to create meaningful connections, whether between potential partners or mentors. At every stage of badge design, you should consider whether you’re helping or hurting this goal. A subtler function of an event badge is its marketing potential.
Name badges act as a small “billboard” for your sponsors and other major brands that you want to highlight throughout the event experience. The repetitive encounter with branding offered by an event badge creates an association between the positive event experience and brands. Event badges offer an opportunity for event personalization. Especially when using on-site badge printing, attendees can input their names, positions, and any “nicknames” that they prefer to go by far easier than pre-printed badges. They offer space to showcase unique benefits, adding a status marker or means of accessing exclusive perks.
For event planners, the name badge offers an efficient means of collecting attendee data, which you’ll use to improve event planning the following year. The event badge can do more than simply telegraph basic attendee information. This multi-functionality underscores the importance of proper badge design.
What to avoid.
Sometimes, it’s easier to start with what NOT to do. Knowing what to avoid will help you shape your event badge design for optimal functionality. Any of the below mistakes will produce event badges that are awkward, complicated and decidedly un-chic.
Awkward name layout
You may be tempted to place the first and last name on one line to save space—don’t! While we understand the motivation, this creates a cramped appearance as the name pushes against the edges. It’s just as awkward to have the last name the same size as the first. Keep the first big and bold to help others see it, but keep the last name smaller to save space.
Fancy fonts
As much as we love to champion outside-the-box thinking, your badge font isn’t the palace for it. Fancy fonts make it harder for attendees and staff to read the badges, producing unnecessary confusion. Stick with fonts like Ariel or OpenSans to guarantee clarity.
Chaotic colors
Similar to the fonts, splashing vivid color combinations across the front of your badge will complicate its essential purpose. While vibrant patterns may look cool along the border of your badge, they’ll distract the eye from the important information. You could consider these the three cardinal sins of badge design. Using them as signposts, you’ll increase your chances of creating beautiful, efficient name badges that support attendee goals while remaining aesthetically perfect.
A winning layout.
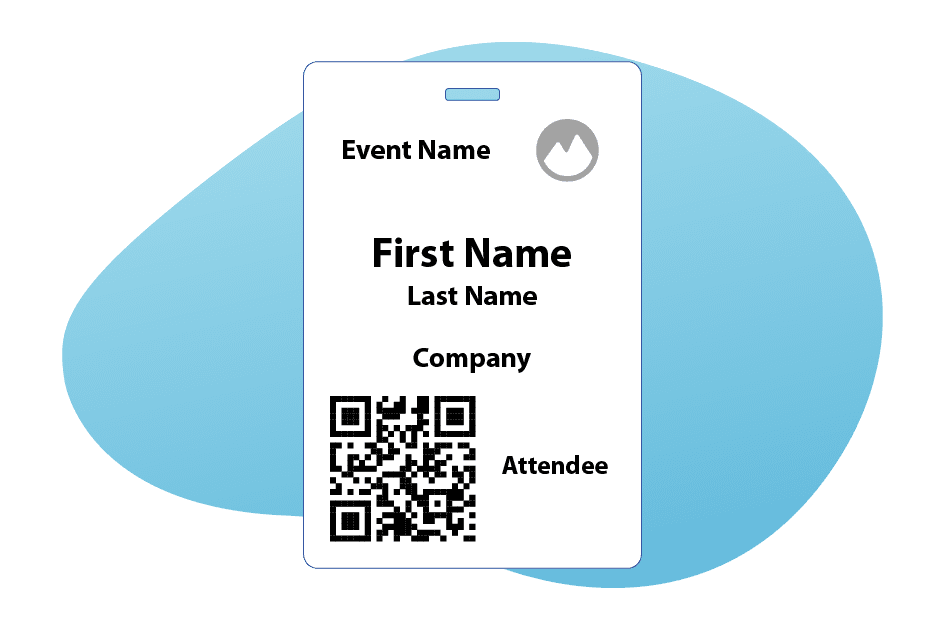
Say it with me: ” Location, location, location!” How you organize your badge layout dictates how well it functions and looks. To create a winning badge layout, everything must be in the right location with the proper size ratios. While your badge size may vary, let’s assume we’re working with a typical 4” x 6.” Set the name size first and then build the rest of your badge around it to ensure optimal legibility. The first name should be visible from around 10 feet away. Other elements include the brand logo, event title, QR code, and guest status, but make sure these aren’t bigger than the name. Check your design to ensure it doesn’t look cluttered.
We recommend placing the event name and sponsor branding above or below the attendee’s name. This creates a frame of relevant but secondary information that guides the eye toward the center of the badge, where the name is the star! Unlike the attendee’s name, this information doesn’t need to be seen from far away. For more inspiration and expert tips, explore our Badge design 101 guide.
If you want to include status or membership markers to communicate a guest’s access level, use color coding with vivid hues that indicate attendee, VIP, speaker, staff, etc. This savvy strategy makes status easily discernible from far away without blowing up the actual text, which would create competition with the name. When it comes to badge layout, less is more. There are plenty of opportunities for sponsor branding throughout your venue, printed materials, and event app. Save space on your event badge and find other areas to place major sponsor imagery.
Importance of the QR code.
It may be surprising to hear, but after the name, the QR code is the most important. That’s because it supports the wider functionality of the event badge. Not only does the QR code aid attendee networking, it also helps event planners. The potential of the QR code is nearly limitless. Especially with popular multi-link sites like Linktree, the QR code can lead attendees to various tools such as contact information, venue maps, and session schedules. It’ll also improve your attendance tracking and support efficient lead retrieval. All of these benefits are available at the scan of a badge!
When designing your event badge, you want to ensure it doesn’t compete with the name for space. Having two prominent items is tricky but not impossible. We recommend placing the QR code just below the name, large enough to be scanned from an arm’s length away. It may be tempting to place the QR code on the back, especially if your event badge already has a lot of imagery. However, this introduces needless complications to event networking. Sure, it isn’t a big deal to have them turn their badges around, but the smoother their experience, the happier they’ll be!

Get creative on the back.
There’s one place where you can really go wild with creative ideas—the back of the badge! While many leave this space blank, it offers a unique opportunity to transform your badge from a functional tool to a souvenir worthy of saving. Event badges with a notch in the middle tend to swing around throughout the day, revealing the “back” of the badge. There’s nothing wrong with a blank back, but adding unique imagery to this space will add unexpected charm to this event detail. Let your design team off the leash! Add custom artwork to the back of your event badge that aligns with the themes and decor of the event experience.
Collaborate with local artists to create stunning badges that attendees can put on display in their homes, offices and apartments. These can act as fun conversation starters between attendees. Use the back of your badge as additional real estate for event sponsor promotions. Sell this space as a part of sponsorship tiers to incentivize deals with desired companies. You can also include the venue’s WiFi password and other relevant information that attendees may need.
![]()
Become a badge design pro.
Creating a striking, functional event badge is a lot easier than you might think! All you have to do is avoid the cardinal sins and embrace your limited space. Use bright colors and bold designs sparingly, or save them for a knock-out back of the badge. Just like with other aspects of event planning, practice makes perfect! Expo Pass offers event planners assistance with check-in and badge design.
Our on-site badge printing system allows planners to customize their designs, print on demand, and improve the attendee experience. Say goodbye to the hassle of pre-printing badges, organizing a cluttered check-in table and correcting misspelled names with a Sharpie.
We’re here to ensure you feel like a badge design pro at every event, from trade shows to conferences and beyond!
Learn more about Expo Pass Check-In and Badge Printing features here, or send us a message at info@expopass.com.